Shopper Product Purchasing Experience
Table of Contents
Sharing Your Store
Once your store setup is complete and you’re ready to welcome shoppers, click the "Go to Store'"button to open your store in a new tab. You can then copy the link and share it as desired.

For example, you can add the link to your school or program website, share it with members and guardians via text or email, or post it on your fundraising and social media pages. Once shoppers receive the link, they will have direct access to your store.
If you’d like to share a specific campaign item from your store, go to your fundraiser dashboard and select the campaign you want to share. Click 'View on Store' and then copy the link to share that specific campaign item.
Shopper View of Your Store
When a potential shopper first visits the online store, they will be presented with a brief introduction to the store, alongside a display of the products available for purchase.

Purchasing Items & Services
Shoppers can effortlessly select a product from the online store to view its detailed description. If an item has different variations available (color, size, etc.), the shopper will need to first select those options for that item to add it to their shopping cart.

After selecting the desired items and choosing their preferred product variations, shoppers can add them to their cart. The number of items in the cart is displayed at the top of the page.
When the shopper is ready to check out and proceed with payment, they can click "Start Checkout" at the top left corner or at the bottom of the page, which will direct them to a summary of their shopping cart, including the total cost.

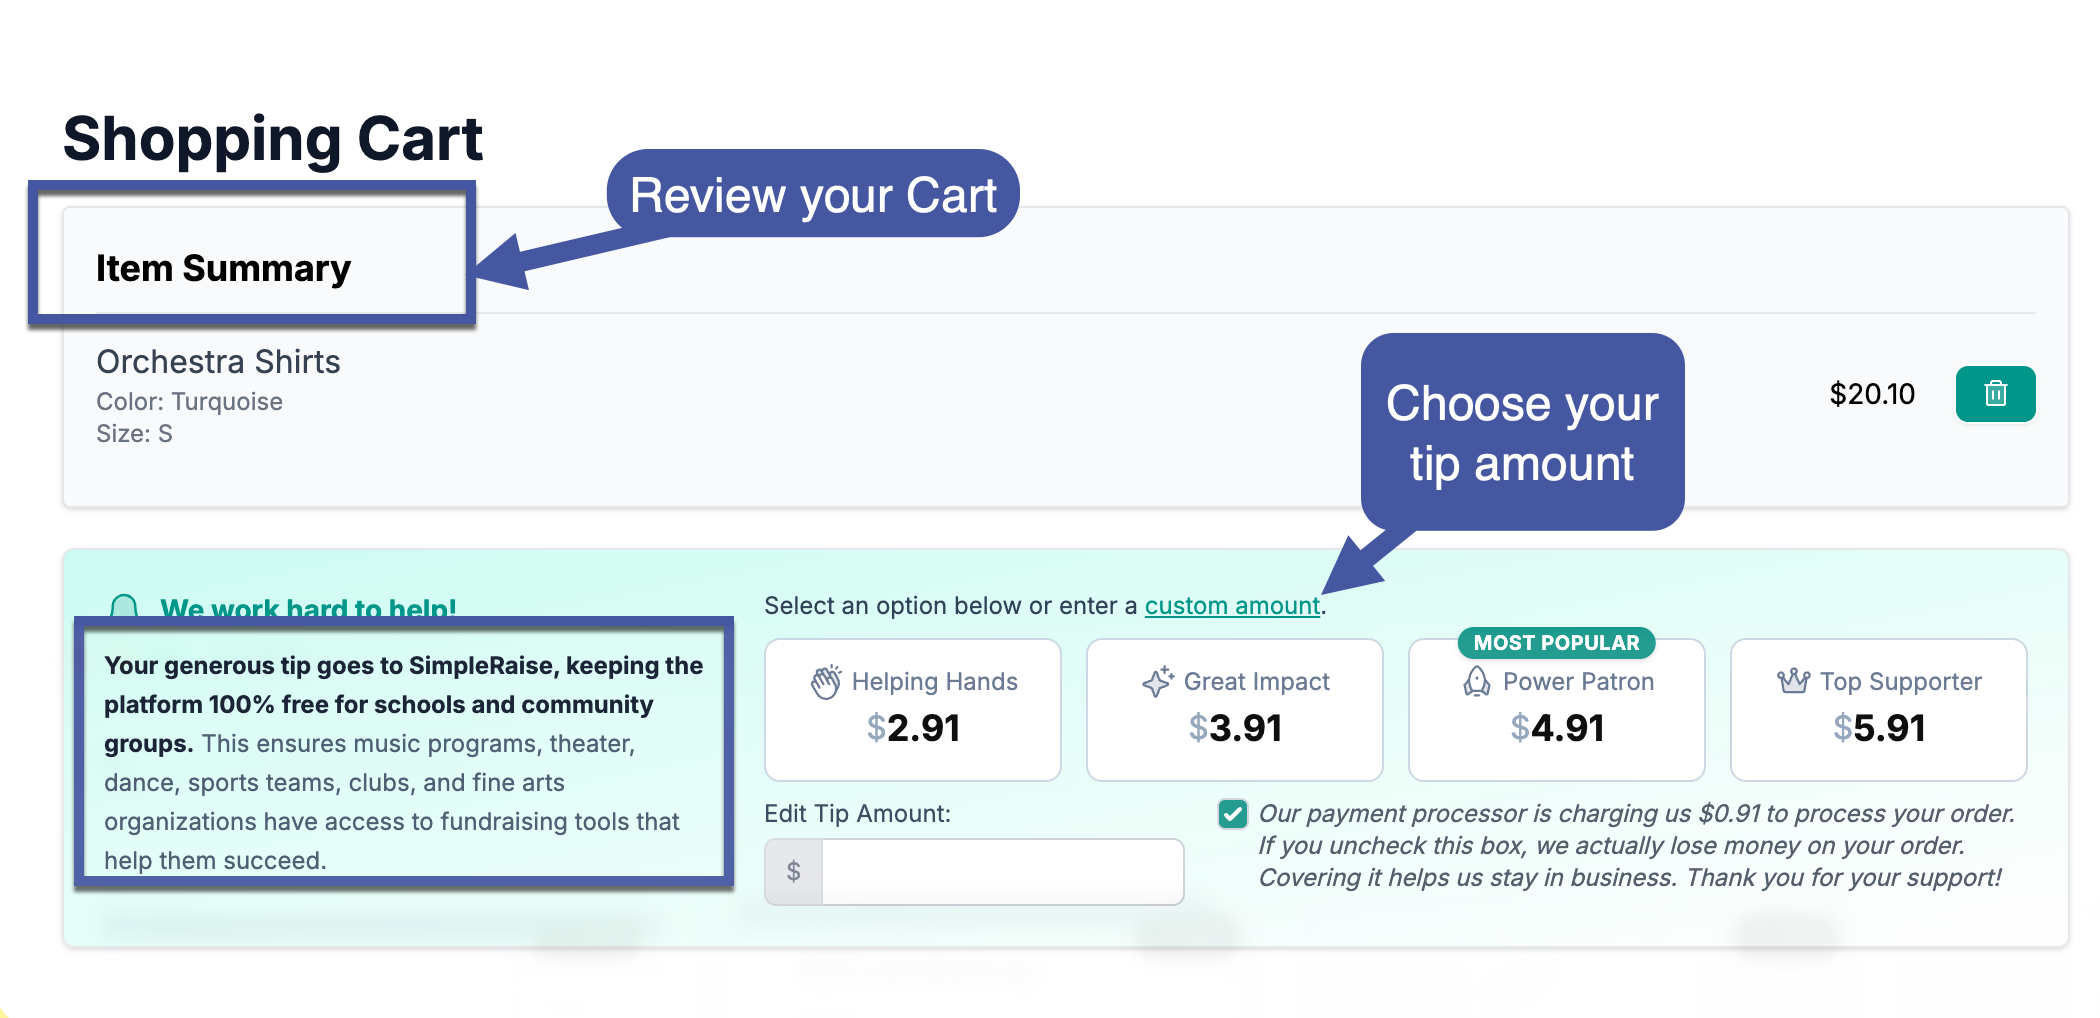
From there, they can opt to add a tip, enter their required email, and answer any additional questions listed before clicking "Proceed to Checkout".
If an item has a required question, shoppers will need to answer it before they can complete their purchase.
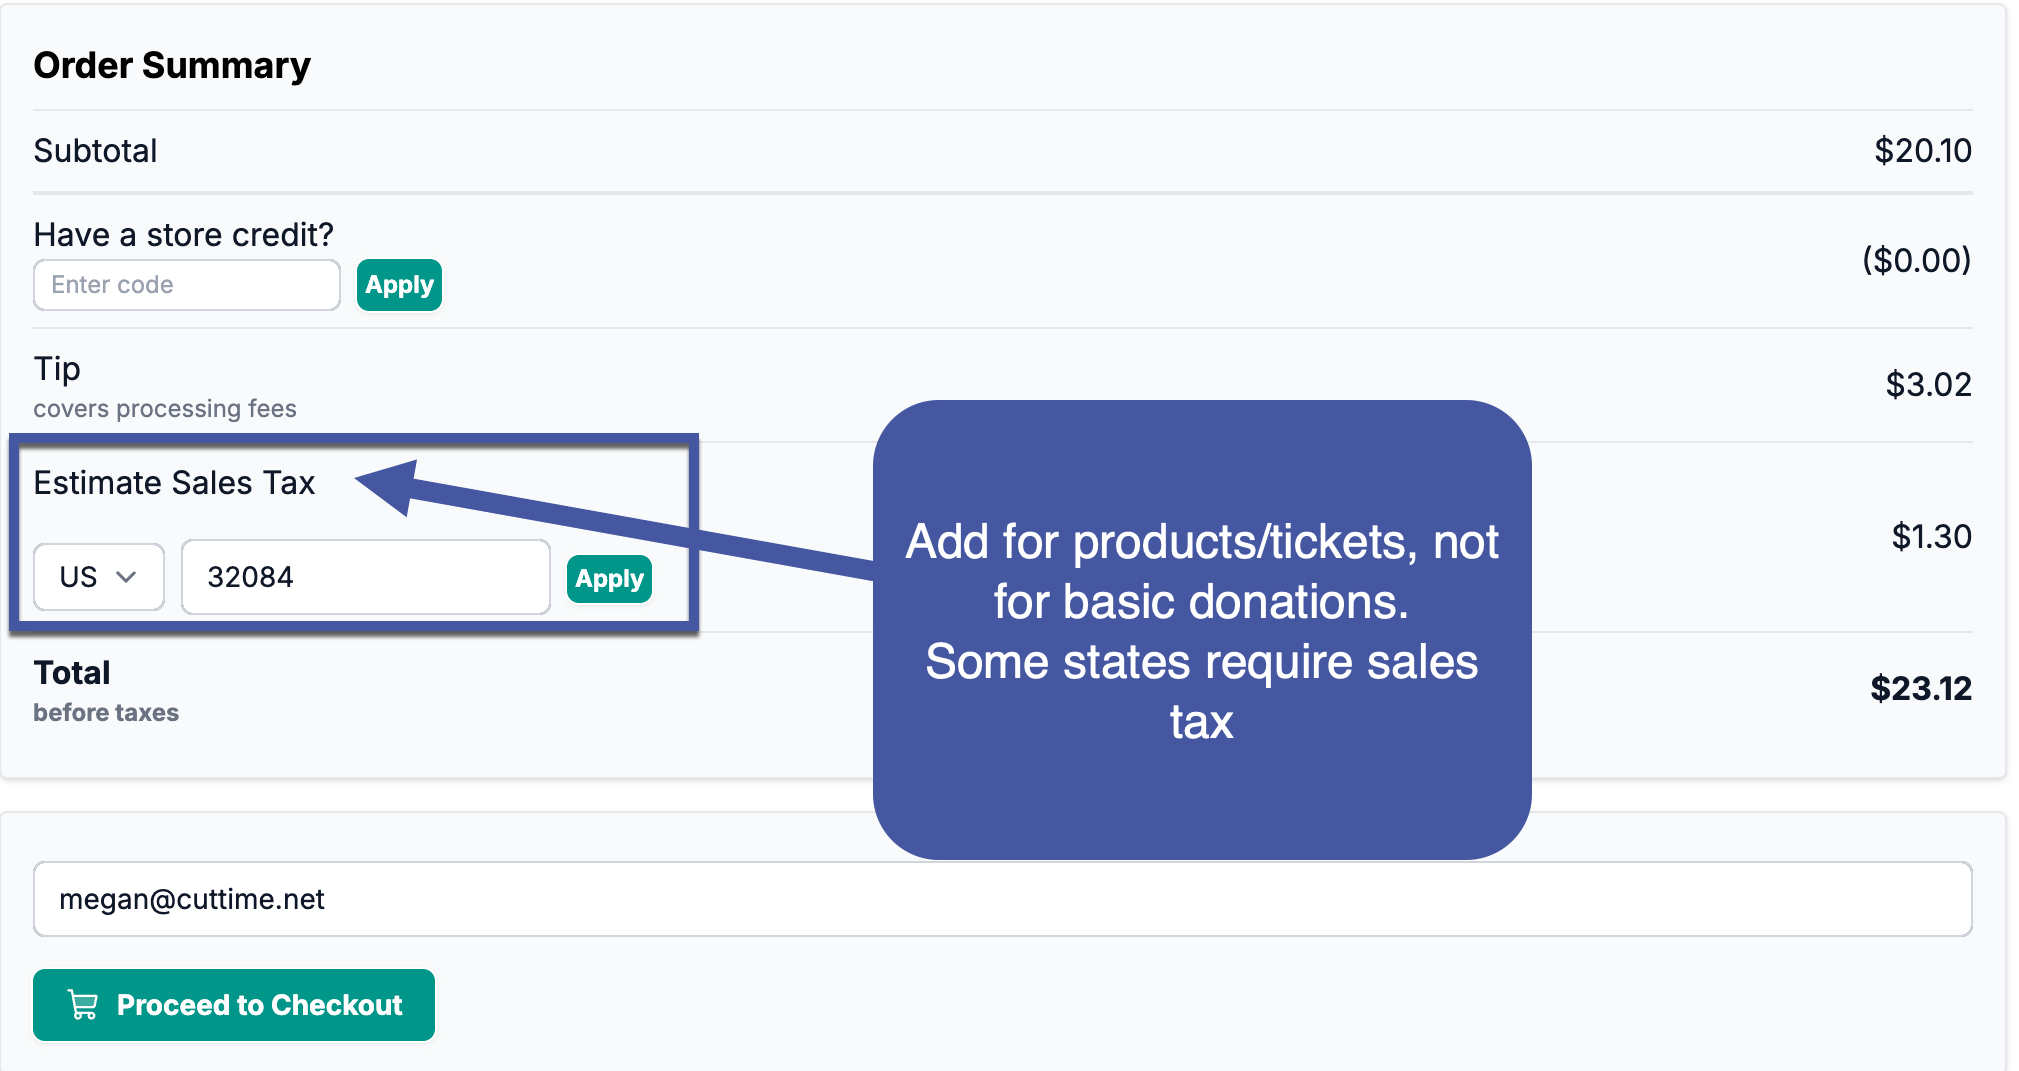
Sales Tax For Products & Tickets
As fundraising continues to evolve, so do state requirements around online sales. When items like products or event tickets are sold, those transactions may be subject to state and local sales tax, since something of value is being exchanged.
To help keep your program compliant and reduce administrative burden, Simple Raise is implementing sales tax collection on applicable transactions. This ensures that any required taxes are calculated and handled appropriately, rather than placing that responsibility on your organization.
It’s important to note that donations are not affected by this change. Since donations are voluntary contributions where nothing is received in return, they remain non-taxable.
Our goal is to make fundraising as simple and worry-free as possible, while keeping everything aligned with current regulations.
Cart Checkout and Receipt Confirmation
Once the payment is successfully processed, the shopper will receive a receipt via email to the address provided during checkout. Additionally, they will be redirected to a confirmation page, verifying that the payment has been successfully completed.

On the confirmation page, the shopper has the option to share the online store on X, Facebook, or via a direct link. To return to the online store, the shopper can select the "Continue Shopping" button located at the bottom of the confirmation page.
Store Credits ("Refunding" a Purchase)
While we don't currently offer refunds on Product Purchases, there is the option for request a Store Credit.
Should you need a refund for a product that you purchased you can reach out to the Support Team to request a Store Credit at Support@simpleraise.com.
NOTE: This feature is only available for Simple Raise Programs that have opted to allow Store Credits for purchases.
If you Program has not requested to utilize our Store Credits feature, then you (as a customer/purchaser of a ticket) will not be eligible for Store Credits.
In addition, Store Credits can only be issued at the discretion of your Simple Raise Program. Our Support Staff will need to confirm that your purchase is eligible for Store Credits.
Once a Store Credit request has been processed by our Support Staff, you will have to option to use those credits for future purchases for other Ticketed Events or Products. We will just need to know where to apply those Credits, so make sure to include that information on your email to our Support Staff.
Store Credits will only apply within the same Program's Store. They cannot be used on another Program's Store.